2024/03/24
Category: Windows
Categories: Linux, Personal, All
This is using Windows 11 Professional but it all should also with the Windows 11 Home version. The first thing to get out of the way is the virtual machine setting in your BIOS. Refer to your computer or motherboard manufacture information as you to how to set this. It is needed for WSL and ultimately Docker. It can be cryptic in what a BIOS may call it so search for visualization setting.
WSL - After setting visualization in your BIOS, install WSL using this method rather than Power Shell only because with Power Shell Ubuntu will be installed and you have no need of it for what we are doing here. Open the Start Menu and in the upper right click All apps. Scroll to the bottom of the window and select Windows Tools. In the resulting window select Control Panel followed by View by in the upper right and do yourself a favor choosing Large icons. Now select Programs and Features followed by Turn Windows features on or off in the upper left. In the resulting dialog, scroll to the bottom like below.
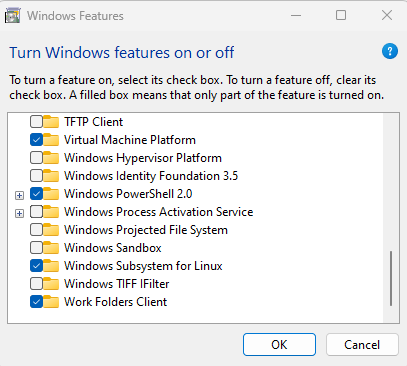
Check Virtual Machine Platform along with Windows Subsystem for Linux and then select Ok. You will be asked to restart Windows after for installation competition.
Docker - Install Docker Desktop for Windows and go through the defaults for installation. After installation, Docker Desktop will open a window. You do not need to login so continue through the various options till you get to the final window. When there click the little gear icon at the top of the window resulting in the below.

Check Start Docker Desktop when you sign in to your computer and remove the check for Open Docker Dashboard when Docker Desktop starts followed by selecting Apply & Restart. You can close the window now.
VSCodium - I use VSCodium rather than VSCode due to Microsoft as I have written before but it does not have a Windows setup. You have to use a package manager. It is amazing how Windows is becoming Linux by using package managers. I have used winget before but it would not function correctly when I wrote this so I used Chocolatey. Use Power Shell pasting their provided commands into it to install it. After installation paste the below into Power Shell to install VSCodium.
choco install vscodiumgit - git is needed for GitHub or for me to use GitLab, where I maintain this site. I installed VSCodium before git so I could choose VSCodium as the git editor during installation.

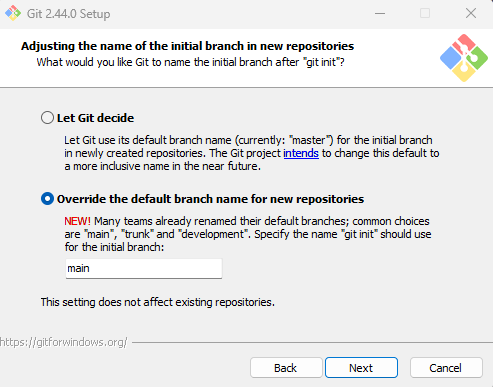
Otherwise the rest of installation are defaults except for one which is branch naming. GitLab is already using main rather than master so I choose the second choice.
Make - Make is needed to proceed with this on Windows. Go here and choose setup program to download. Install make with all defaults. Now you need to add make to the Windows path variable so if can be ran in a Command Prompt from anywhere.
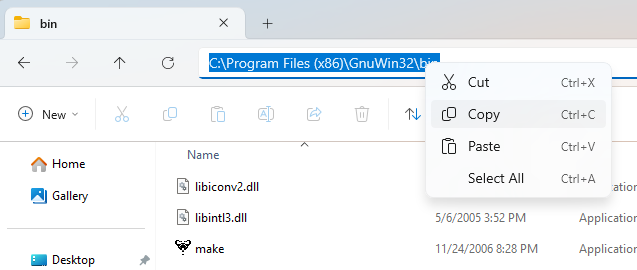
Go to the location of the make application at C:\Program Files (x86)\GnuWin32\bin and right-click to copy the path or just copy what I have here.

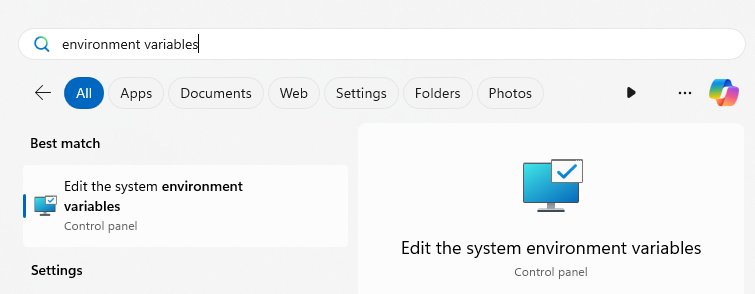
Open the Start Menu and in Search at the top type environment variable and you should get the below suggestions so click on the suggestion Edit the system environment variables.
Highlight the Path variable and select Edit and the below dialog will appear. Select New and paste in the path to make you copied above earlier selecting Ok afterward. Close all the windows and you will have to reboot for the new path to take effect. After the reboot make should function from anywhere in a Command Prompt.
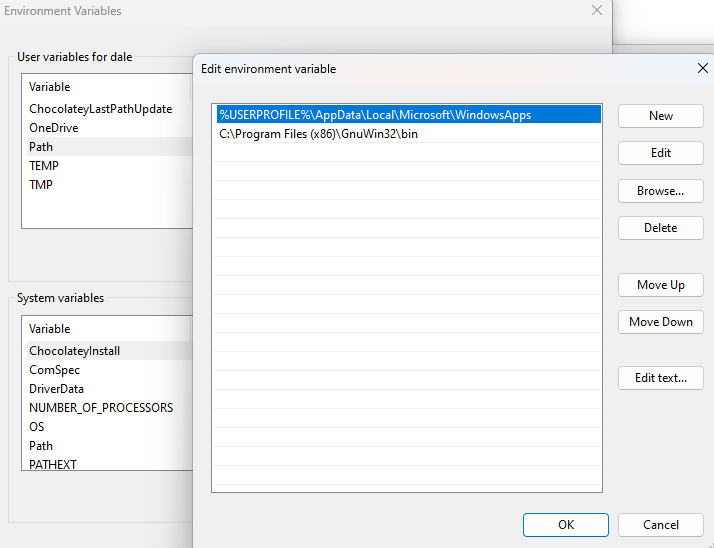
From here things should function as they need in my previous post concerning Creating and Maintaining this Site. Go through the process of the docker file and make file. Along with git and everything. The only issue I have seen with this so far in Windows concerns Terminal in VSCodium. When opening a New Terminal click the little down arrow and choose GitBash. It is basically a bash prompt on Windows.

One last thing I did not mention in the previous post, I created a small bash script to launch a make npm run serve command without having to type it all in Terminal each time I wish to use it. I saved it as a file named web and gave it execution permission so when I wish to use it I type ./web and my browser opens with my site locally. If you create this in Windows, type this for execution permissions, chmod +x web.
#!/usr/bin/env bash

make npm run serve
In putting this together I realized I could now do all of this on my Windows 11 notebook as well as my Arch Linux machine. But there is one git command I need to start using and it is git pull origin main going from one to the other.
Wish to add a comment? Please include your name to display in your comment or anonymous.
Your email address will never be shared with anyone.
Email me a comment to post it.